class A{
public int getValue(){
if(true)
return 1;
}
}
ans:Error: missing return statement
compile time error
----------------------------------------
class A{
public int getValue(){
if(true)
return 1;
else
return 2;
}
}
output: 1
--------------------------------------------
class A{
public int getValue(){
if(true)
return 1;
return 2;
}
}
output: 1
-----------------------------------------------------
class A{
public int getValue(){
if(!true)
return 1;
else
return 2;
}
}
output: 2
------------------------------------------------------
public class Missing {
public static void main(String[] args) {
System.out.println(new A().getValue());
}
}
Monday, September 27, 2010
Thursday, September 23, 2010
ant script for web apps
before getting started our ant script you should know development and deployment structures of web application.

lib- all jar
src- all java or POJO
web or WebContent- web folder
etc-config file
dist-
build-


1. create a "build.properties"

root.dir=..
lib.dir=lib
src.dir=src
dist.dir=dist
build.dir=build
web.content=WebContent
build.classpath=build/WEB-INF/classes
project.name=Opgear

2. create a "build.xml" for automated the war deployment

our target

1.clean
2.makedir
3.compile
4.copy dependencies
5.war
< ?xml version="1.0" encoding="UTF-8" standalone="no"? >
< project basedir="." default="build" name="opgear" >
< property file="build.properties"/ >
< property environment="env"/ >
< property name="ECLIPSE_HOME" value="../../eclipse"/ >
< property name="debuglevel" value="source,lines,vars"/ >
< property name="target" value="1.6"/ >
< property name="source" value="1.6"/ >
< path id="java.classpath" >
< pathelement location="bin"/ >
< /path >
< !-- First, I create my classpath (build.classpath) from all the jar files in my lib directory -- >
< path id="build.classpath" >
< fileset dir="lib" >
< include name="**/*.jar" / >
< /fileset >
< /path >
< !-- Deletes or clear the existing build, dist directory-- >
< target name="clean" >
< delete dir="${build.dir}" / >
< delete dir="${build.classpath}" / >
< delete dir="${dist.dir}" / >
< /target >
< !-- Creates the build, docs and dist directory-- >
< target name="makedir" >
< mkdir dir="${build.dir}" / >
< mkdir dir="${build.classpath}" / >
< mkdir dir="${dist.dir}" / >
< /target >
< !-- Compiles the java code -- >
< target name="compile" depends="clean, makedir" >
< echo > Compile the source files< /echo >
< javac srcdir="${src.dir}" destdir="${build.dir}/WEB-INF/classes" classpathref="build.classpath" >
< /javac >
< /target >
< !--copy the compiled classess and webcontent to build dir -- >
< target name="copy" depends="compile" >
< echo > todir ${build.dir} < /echo >
< copy todir="${build.dir}" >
< fileset dir="${web.content}"/ >
< /copy >
< copy todir="${build.dir}/WEB-INF/lib" >
< fileset dir="${lib.dir}"/ >
< /copy >
< /target >
< !--Creates the deployable jar file -- >
< target name="war" depends="copy" >
< echo > Building the war file< /echo >
< war destfile="${dist.dir}/${project.name}.war" webxml="${build.dir}/WEB-INF/web.xml" >
< fileset dir="${build.dir}"/ >
< /war >
< /target >
< target name="build" depends="compile,war" >
< description > Main target< /description >
< /target >
< /project >
Wednesday, September 22, 2010
Singleton Pattern
The Singleton Pattern ensures a class has only one instance, and provides a global point of access to it.
Singleton Code Example
public final class MySingleton {
private static MySingleton instance;
private MySingleton(){ }
public static MySingleton getInstance(){
if(instance==null){
instance = new MySingleton();
}
return instance;
}
}
note:
Singleton Code Example
public final class MySingleton {
private static MySingleton instance;
private MySingleton(){ }
public static MySingleton getInstance(){
if(instance==null){
instance = new MySingleton();
}
return instance;
}
}
note:
Thread safety warning!
As shown above, the singleton is not thread safe. Used properly, singletons can be beneficial. Some people believe they are just evil. There are two camps, as usual. An alternative to the Singleton pattern is using a factory class to manage singletons. In other words, inside of a factory class, you can ensure that one and only one object is created.
If you are thinking about implementing this pattern, please review the following article first:
- Two approaches to creating thread-safe singletons
- "Effective Object-Oriented Design," and " Class Instances,
Regular Expressions syntax
Commonly, use of Regular Expressions in Java will look something like this:
Pattern pattern = Pattern.compile("INSERT REGULAR EXPRESSION");
Matcher matcher = pattern.matcher("INSERT INPUT STRING TO SEARCH");
boolean found = false;
while (matcher.find()) {
...do something...
}
def:
* A Pattern object is a compiled representation of a regular expression.
* A Matcher object is the engine that interprets the pattern and performs match operations against an input string.
Prepare the Tomcat Manager application
In order to deploy a web app to your Tomcat server, you will need to ensure that you can access the Tomcat Manager application at: http://localhost:8080/manager/html.
Typically, you just need to ensure that your/conf/tomcat-users.xml file has the following defined:
< ?xml version='1.0' encoding='utf-8'?>
< tomcat-users>
< role rolename="manager"/>
< role rolename="admin"/>
< user username="admin" password="admin" roles="admin,manager"/>
< /tomcat-users>
In this case, we will be logging in to the Tomcat Manager app using:
username admin
password admin
Typically, you just need to ensure that your
< ?xml version='1.0' encoding='utf-8'?>
< tomcat-users>
< role rolename="manager"/>
< role rolename="admin"/>
< user username="admin" password="admin" roles="admin,manager"/>
< /tomcat-users>
In this case, we will be logging in to the Tomcat Manager app using:
username admin
password admin
Tuesday, September 21, 2010
ant superb
Apache Ant is a powerful way to convert your developmental structures to deployment structures. It is declarative and all the command line tasks used for deploying an application are represented by simple XML elements. Without much details, this tutorial would breeze you through the steps on how to build a web application using a single XML build file and nothing else. If you have not yet understood what is the use of Ant, read my article on Development and Deployment Structures – the perfect way to build web applications.
I would use the same analogy of my development structure as mentioned in the above linked article i.e. my development structure consists of the following directories:
1. web – place for all my JSP, HTML, JavaScripts and Stylesheets. You can provide subdirectories as required for each of the different set of files
2. src – place for my java class files consisting of POJO’s or servlets.
3. etc – place for all config files like the most common web.xml
4. lib - place for all the necessary jar files to run my application. I even have included servlet-api.jar in this directory since you may have to deploy your web application in a remote server after compiling.
5. build – a temporary directory for keeping the compiled files
6. dist – a place to put in the finally packaged war file (distribution)
7. ant- place for my build.xml file and external properties file
All these directories are present in a parent directory called “WebApp“. The three things you have to keep in mind for making an Ant build file are -
1. tasks - which correspond to your command line tasks like javac, war etc. A group of tasks can be executed in a sequence by specifying targets.
2. target – It is like a function where you put reusable tasks so that it can be called later without duplicating them.
3. property – this element is used to define variables in your build file which is useful when the value like project_name or folder_name keeps on changing.
One of the most awesome features of Ant is that you can keep the properties file externally inside of defining all the variables within the build file. This properties file consists of all the required variables and their values in the form of name-value pairs and is simple text file. In this tutorial I would be using an external properties file.
For the tutorial I have used the following:
1. Java version 1.5
2. Apache Tomcat 5.0
3. Apache Ant 1.6.5
Okay we are now good to go with the great Ant tutorial. For this make a file with the name “build.properties“. This would be our external variables file.
root.dir=..

lib.dir=lib

src.dir=com

conf.dir=etc

web.content=web

project.name=WebApp

build.dir=build
NOTE: you must hit the ENTER key for starting a new line after the last line or Ant will give you an error “BUILD FAILED for some unknown reason”
It is not necessary to put in the name with the dot. You can have a name as “projectName” but there should be no quotes for the value. i.e it should NOT be projectName=”WebApp”
To make a build file we have to remember what is to be done for the deployments. To make things simple just make the modules (targets) necessary for the complete web application deployment which are
1. clean – remove all prior deployments of the same application if made
2. init – make the necessary structure for deployment as per the vendor’s
3. compile – compile your servlets or POJO’s
4. copy – put the compiled files and web content in the deployment structre as created during init
5. war – make the war file and open the browser
Start making the build.xml file in the ant folder as follows:
< project name="AppBuilder" default="war" basedir="..">
< property file="ant/build.properties"/>
< /project>
Now we have to set the classpath for the servlet-api.jar to compile our servlets so put the servlet-api.jar in the lib directory of your development structure. Check the property “default” in the element. It states the LAST module (target) inside the build file. In our case it is “war”
All the following XML elements will now go inside the
< path id="classpath">
< fileset dir="${lib.dir}" includes="servlet-api.jar"/>
< /path>
Here you need to set all the necessary jars to your classpath for successful compilation of the java source files. ${lib.dir} is used to retrive the value of the “lib.dir” i.e lib
Now we will start with out targets (modules) as mentioned in the list above :
1. clean
< target name="clean">
< echo>Cleaning the ${build.dir}
< delete dir="${build.dir}"/>
< /target>
Here I am removing my build dir in case it was present earlier with compiled files
The element is only for displaying what you are doing in the command line.
2. init
< target name="init" depends="clean">
< echo>Creating the build directory
< mkdir dir="${build.dir}/WEB-INFclasses"/>
< mkdir dir="${build.dir}/WEB-INFlib"/>
< /target>
Here I am creating the normal deployment structure required for tomcat namely WebApp/WEB-INF/classes, etc. It doesn’t matter if the folder WEB-INF existed before making the folder classes. Ant automatically creates all the necessary parent folders if they don’t exist.
3. compile
< target name="compile" depends="init">
< echo>Compile the source files
< javac srcdir="${src.dir}" destdir="${build.dir}/WEB-INF/classes">
< /javac>
< /target>
Most important step and the most error giving step. Make sure that all the classpath have been set in the above element. If all are proper then the all files in “src.dir” will be compiled successfully and moved to the build\WebApp\WEB-INF\classes. Just check the property “depends” of the element here. This property is used to chain the modules (targets) in a sequential manner.
4. copy
< target name="copy" depends="compile">
< copy todir="${build.dir}/WEB-INF">
< fileset dir="${conf.dir}"/>
< /copy>
< copy todir="${build.dir}">
< fileset dir="${web.content}"/>
< /copy>
< copy todir="${build.dir}/WEB-INF/lib">
< fileset dir="${lib.dir}"/>
< /copy>
< /target>
Here I am just copying my complied classes and web content files inside the corresponding deployment structure.
5. war
< target name="war" depends="copy">
< echo>Building the war file
< war destfile="${dist.dir}/${project.name}.war" webxml="${build.dir}/WEB-INF/web.xml">
< fileset dir="${build.dir}"/>
< /war>
< /target>
This is the final module (target) in my build.xml file which makes the WebApp.war required for the deployment. “war” is an Ant task for which you provide the path of the web.xml file and the directory which contains the deployment structure i.e in our case “build” directory. The destfile is the final location and name of the war file which would become dist\WebApp.war after the script has run.
I would use the same analogy of my development structure as mentioned in the above linked article i.e. my development structure consists of the following directories:
1. web – place for all my JSP, HTML, JavaScripts and Stylesheets. You can provide subdirectories as required for each of the different set of files
2. src – place for my java class files consisting of POJO’s or servlets.
3. etc – place for all config files like the most common web.xml
4. lib - place for all the necessary jar files to run my application. I even have included servlet-api.jar in this directory since you may have to deploy your web application in a remote server after compiling.
5. build – a temporary directory for keeping the compiled files
6. dist – a place to put in the finally packaged war file (distribution)
7. ant- place for my build.xml file and external properties file
All these directories are present in a parent directory called “WebApp“. The three things you have to keep in mind for making an Ant build file are -
1. tasks - which correspond to your command line tasks like javac, war etc. A group of tasks can be executed in a sequence by specifying targets.
2. target – It is like a function where you put reusable tasks so that it can be called later without duplicating them.
3. property – this element is used to define variables in your build file which is useful when the value like project_name or folder_name keeps on changing.
One of the most awesome features of Ant is that you can keep the properties file externally inside of defining all the variables within the build file. This properties file consists of all the required variables and their values in the form of name-value pairs and is simple text file. In this tutorial I would be using an external properties file.
For the tutorial I have used the following:
1. Java version 1.5
2. Apache Tomcat 5.0
3. Apache Ant 1.6.5
Okay we are now good to go with the great Ant tutorial. For this make a file with the name “build.properties“. This would be our external variables file.
root.dir=..
lib.dir=lib
src.dir=com
conf.dir=etc
web.content=web
project.name=WebApp
build.dir=build
NOTE: you must hit the ENTER key for starting a new line after the last line or Ant will give you an error “BUILD FAILED for some unknown reason”
It is not necessary to put in the name with the dot. You can have a name as “projectName” but there should be no quotes for the value. i.e it should NOT be projectName=”WebApp”
To make a build file we have to remember what is to be done for the deployments. To make things simple just make the modules (targets) necessary for the complete web application deployment which are
1. clean – remove all prior deployments of the same application if made
2. init – make the necessary structure for deployment as per the vendor’s
3. compile – compile your servlets or POJO’s
4. copy – put the compiled files and web content in the deployment structre as created during init
5. war – make the war file and open the browser
Start making the build.xml file in the ant folder as follows:
< project name="AppBuilder" default="war" basedir="..">
< property file="ant/build.properties"/>
< /project>
Now we have to set the classpath for the servlet-api.jar to compile our servlets so put the servlet-api.jar in the lib directory of your development structure. Check the property “default” in the
All the following XML elements will now go inside the
< path id="classpath">
< fileset dir="${lib.dir}" includes="servlet-api.jar"/>
< /path>
Here you need to set all the necessary jars to your classpath for successful compilation of the java source files. ${lib.dir} is used to retrive the value of the “lib.dir” i.e lib
Now we will start with out targets (modules) as mentioned in the list above :
1. clean
< target name="clean">
< echo>Cleaning the ${build.dir}
< delete dir="${build.dir}"/>
< /target>
Here I am removing my build dir in case it was present earlier with compiled files
The
2. init
< target name="init" depends="clean">
< echo>Creating the build directory
< mkdir dir="${build.dir}/WEB-INFclasses"/>
< mkdir dir="${build.dir}/WEB-INFlib"/>
< /target>
Here I am creating the normal deployment structure required for tomcat namely WebApp/WEB-INF/classes, etc. It doesn’t matter if the folder WEB-INF existed before making the folder classes. Ant automatically creates all the necessary parent folders if they don’t exist.
3. compile
< target name="compile" depends="init">
< echo>Compile the source files
< javac srcdir="${src.dir}" destdir="${build.dir}/WEB-INF/classes">
< /javac>
< /target>
Most important step and the most error giving step. Make sure that all the classpath have been set in the above
4. copy
< target name="copy" depends="compile">
< copy todir="${build.dir}/WEB-INF">
< fileset dir="${conf.dir}"/>
< /copy>
< copy todir="${build.dir}">
< fileset dir="${web.content}"/>
< /copy>
< copy todir="${build.dir}/WEB-INF/lib">
< fileset dir="${lib.dir}"/>
< /copy>
< /target>
Here I am just copying my complied classes and web content files inside the corresponding deployment structure.
5. war
< target name="war" depends="copy">
< echo>Building the war file
< war destfile="${dist.dir}/${project.name}.war" webxml="${build.dir}/WEB-INF/web.xml">
< fileset dir="${build.dir}"/>
< /war>
< /target>
This is the final module (target) in my build.xml file which makes the WebApp.war required for the deployment. “war” is an Ant task for which you provide the path of the web.xml file and the directory which contains the deployment structure i.e in our case “build” directory. The destfile is the final location and name of the war file which would become dist\WebApp.war after the script has run.
ant superb
Apache Ant is a powerful way to convert your developmental structures to deployment structures. It is declarative and all the command line tasks used for deploying an application are represented by simple XML elements. Without much details, this tutorial would breeze you through the steps on how to build a web application using a single XML build file and nothing else. If you have not yet understood what is the use of Ant, read my article on Development and Deployment Structures – the perfect way to build web applications.
I would use the same analogy of my development structure as mentioned in the above linked article i.e. my development structure consists of the following directories:
- web – place for all my JSP, HTML, JavaScripts and Stylesheets. You can provide subdirectories as required for each of the different set of files
- src – place for my java class files consisting of POJO’s or servlets.
- etc – place for all config files like the most common web.xml
- lib - place for all the necessary jar files to run my application. I even have included servlet-api.jar in this directory since you may have to deploy your web application in a remote server after compiling.
- build – a temporary directory for keeping the compiled files
- dist – a place to put in the finally packaged war file (distribution)
- ant- place for my build.xml file and external properties file
All these directories are present in a parent directory called “WebApp“. The three things you have to keep in mind for making an Ant build file are -
- tasks - which correspond to your command line tasks like javac, war etc. A group of tasks can be executed in a sequence by specifying targets.
- target – It is like a function where you put reusable tasks so that it can be called later without duplicating them.
- property – this element is used to define variables in your build file which is useful when the value like project_name or folder_name keeps on changing.
One of the most awesome features of Ant is that you can keep the properties file externally inside of defining all the variables within the build file. This properties file consists of all the required variables and their values in the form of name-value pairs and is simple text file. In this tutorial I would be using an external properties file.
For the tutorial I have used the following:
Okay we are now good to go with the great Ant tutorial. For this make a file with the name “build.properties“. This would be our external variables file.
root.dir=..
lib.dir=lib
src.dir=com
conf.dir=etc
web.content=web
project.name=WebApp
build.dir=build
NOTE: you must hit the ENTER key for starting a new line after the last line or Ant will give you an error “BUILD FAILED for some unknown reason”
It is not necessary to put in the name with the dot. You can have a name as “projectName” but there should be no quotes for the value. i.e it should NOT be projectName=”WebApp”
To make a build file we have to remember what is to be done for the deployments. To make things simple just make the modules (targets) necessary for the complete web application deployment which are
- clean – remove all prior deployments of the same application if made
- init – make the necessary structure for deployment as per the vendor’s
- compile – compile your servlets or POJO’s
- copy – put the compiled files and web content in the deployment structre as created during init
- war – make the war file and open the browser
Start making the build.xml file in the ant folder as follows:
<> name="AppBuilder" default="war" basedir="..">

	<> file="ant/build.properties"/>

< /project>
Now we have to set the classpath for the servlet-api.jar to compile our servlets so put the servlet-api.jar in the lib directory of your development structure. Check the property “default” in the
All the following XML elements will now go inside the
<> id="classpath">

	<> dir="${lib.dir}" includes="servlet-api.jar"/>

< /path>
Here you need to set all the necessary jars to your classpath for successful compilation of the java source files. ${lib.dir} is used to retrive the value of the “lib.dir” i.e lib
Now we will start with out targets (modules) as mentioned in the list above :
1. clean
<> name="clean">

	< style="color: rgb(0, 0, 0); font-weight: bold;">>Cleaning the ${build.dir}>

	<> dir="${build.dir}"/>

< /target>
Here I am removing my build dir in case it was present earlier with compiled files
The
2. init
<> name="init" depends="clean">

	< style="color: rgb(0, 0, 0); font-weight: bold;">>Creating the build directory>

	<> dir="${build.dir}/WEB-INFclasses"/>

	<> dir="${build.dir}/WEB-INFlib"/>

< /target>
Here I am creating the normal deployment structure required for tomcat namely WebApp/WEB-INF/classes, etc. It doesn’t matter if the folder WEB-INF existed before making the folder classes. Ant automatically creates all the necessary parent folders if they don’t exist.
3. compile
<> name="compile" depends="init">

	< style="color: rgb(0, 0, 0); font-weight: bold;">>Compile the source files>

	<> srcdir="${src.dir}" destdir="${build.dir}/WEB-INF/classes">

		<> refid="classpath"/>

	< /javac>

< /target>
Most important step and the most error giving step. Make sure that all the classpath have been set in the above
4. copy
<> name="copy" depends="compile">

	<> todir="${build.dir}/WEB-INF">

		<> dir="${conf.dir}"/>

	< /copy>

	<> todir="${build.dir}">

		<> dir="${web.content}"/>

	< /copy>

	<> todir="${build.dir}/WEB-INF/lib">

		<> dir="${lib.dir}"/>

	< /copy>

< /target>
Here I am just copying my complied classes and web content files inside the corresponding deployment structure.
5. war
<> name="war" depends="copy">

	< style="color: rgb(0, 0, 0); font-weight: bold;">>Building the war file>

	<> destfile="${dist.dir}/${project.name}.war" webxml="${build.dir}/WEB-INF/web.xml">

		<> dir="${build.dir}"/>

	< /war>

< /target>
This is the final module (target) in my build.xml file which makes the WebApp.war required for the deployment. “war” is an Ant task for which you provide the path of the web.xml file and the directory which contains the deployment structure i.e in our case “build” directory. The destfile is the final location and name of the war file which would become dist\WebApp.war after the script has run.
Running the above script
Keep the build.properties and build.xml files in the ant folder. Make sure that the ANT_HOME environment variable is set to your ant’s installation bin directory. Now, all you have to do is run the ant command on the build file as,
C:\> cd WebAppant\ant

C:\WebAppant\ant> ant
That’s it. If successful your development will finally become a fully packaged WebApp.war.
Monday, September 20, 2010
The Processing Instruction Target Matching “[xX][mM][lL]” is Not Allowed
problem was ---"white space "
So, the solution is, there should be no characters (not even white space) before the starting XML. Or do a Trim() before passing it on to the XmlParse() but sometimes that option is not available because XmlParse could be sitting inside a service layer somewhere.
So, the solution is, there should be no characters (not even white space) before the starting XML. Or do a Trim() before passing it on to the XmlParse() but sometimes that option is not available because XmlParse could be sitting inside a service layer somewhere.
The 80/20 Performance Rule
Vilfredo Pareto, an economist in the early 1900s, made a famous observation where 80% of the nation’s wealth belonged to 20% of the population. This was later generalized into what’s commonly referred to as the Pareto principle (also known as the 80-20 rule), which states for any phenomenon, 80% of the consequences come from 20% of the causes. We see this phenomenon in software engineering where 80% of the time is spent in only 20% of the code. When we optimize our applications, we know to focus on that 20% of the code. This same technique should also be applied when optimizing web pages. Most performance optimization today are made on the parts that generate the HTML document (apache, C++, databases, etc.), but those parts only contribute to about 20% of the user’s response time. It’s better to focus on optimizing the parts that contribute to the other 80%.
Thursday, September 16, 2010
Environment Variables In Linux
Environment variables handle or control the flow of running processes in the operating system. Environment variable has a value and a variable which is using some particular application. As a example in Java program, Operating system consist a variable call "PATH" and the value is the path of java's bin directory. Likewise most of the programs (actually running processes) are using Environment Variables for their various types of activities.
Environment Variables are stored in two difference ways called Session Specific and System Specific.
1. Session Specific Variables.
These are mostly stored in the specific hidden files/scripts in your home directory. Specially we can identify 3 ways to store Environment Variables.
These Variables are using whole System and affected all users/sessions in runing time.
We can easily view already stored Environment Variables using Terminal.
- Display Currently defined variable list.
printenv
- Display Currently defined variable list.
echo $PATH (display the program search path)
- using env
- Set Environment variables.
export PATH=$PATH:/usr/java/jdk1.5.0_07/bin
- Erasing Environment Variables.
export PATH=Using above commands you can handle environment variables temporally. If you want to handle Environment Variables Permanently you want to know how they are stored in your architecture.
Environment Variables are stored in two difference ways called Session Specific and System Specific.
1. Session Specific Variables.
These are mostly stored in the specific hidden files/scripts in your home directory. Specially we can identify 3 ways to store Environment Variables.
- ~/.profile
- ~/.bash_profile or ~/.bash_login
- ~/.bashrc
- ~/.bash_logout
These Variables are using whole System and affected all users/sessions in runing time.
- /etc/profile
- /etc/bash.bashrc
- /etc/environment
Monday, September 13, 2010
HTML
HTML articles on
* Web security
* DOM manipulation
* CSS and style
Dive into DOM objects, including
* document
* window
* history
* location
* navigator
* screen
* and other historical curiosities
Style your pages with CSS
* CSS properties
* at-rules
* colors
* ...and more on the way
link here: http://code.google.com/p/doctype/wiki/Welcome?tm=6
Wednesday, September 8, 2010
Java Mail
The Java Mail API provides a platform-independent framework to develop mail and messaging applications in Java technology. Java Mail API is also protocol-independent making it more useful. You can use many different protocols to work with mails and messages.
Java mail api is designed to provide functionality such as read, compose and send from within your java programs.
Possible Uses
1. Send Email from any type of java application
2. Composing, reading and sending electronic mail
3. Send Email from java stored procedure.
4. Create a GUI Email client.
5. Dealing with sending and receiving attachments with Email.
6. To search for messages.
How does Email works
Email client Program sends the message to Email server.
Email server contact to the Recipient’s Email server provided in the Email address.
Email server checks that user name is valid or not.
If found valid send email to the address’s email server.
When recipient log on his mail account, gets his Email.
Mailing protocols
Basically, a protocol represents standard method used at each end of a communication channel, in order to properly transmit information.
Generally four protocols are used to send and receive Emails:
1. Simple Mail Transfer Protocol (SMTP)
2. POP (Post Office Protocol 3)
3. IMAP (Internet Message Access Protocol)
4. MAPI (Messaging Application Program Interface)
package com.itech;
import java.util.*;
import javax.mail.*;
import javax.mail.internet.*;
public class SendMail {
public static void main(String args[]) throws Exception {
String host = "96.31.77.38";
String from = "karthik.kannan@iopextech.com";
String to = "karthik.kannan@iopextech.com";
// Get system properties
Properties properties = System.getProperties();
// Setup mail server
properties.setProperty("mail.smtp.host", host);
// Get the default Session object.
Session session = Session.getDefaultInstance(properties);
// Create a default MimeMessage object.
MimeMessage message = new MimeMessage(session);
// Set the RFC 822 "From" header field using the
// value of the InternetAddress.getLocalAddress method.
message.setFrom(new InternetAddress(from));
// Add the given addresses to the specified recipient type.
message.addRecipient(Message.RecipientType.TO, new InternetAddress(to));
// Set the "Subject" header field.
message.setSubject("sample test mail..!");
// Sets the given String as this part's content,
// with a MIME type of "text/plain".
message.setText("Hi karthik....../n how are you?");
// Send message
Transport.send(message);
System.out.println("Message Send.....");
}
}
Web Browser in java
1. Open netbeans ide.
2. Create a new project. File->New Project. Select “General” and on the right pane, choose “Java Application”.
3. Click next. Give the project name as “TwoMinBrowser” and “Finish”.
Your project is ready. Go to java.net and download JDIC (JDesktop Integration Components). It doesn’t come as a part of Java SE 5.0 or J2SE 4.0. Good news is that, it is a part of Mustang (Java SE 6). Unpack the JDIC zip file and you will find a “jdic.jar”.
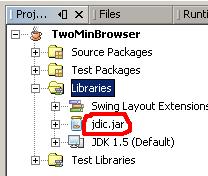
Click on the Projects tab in the IDE (Window->Projects), expand TwoMinBrowser. Now expand “Libraries” section, right click on it and select “Add JAR/Folder”. Navigate to the “jdic.jar” and add it. The projects tab should be like the image on the left.
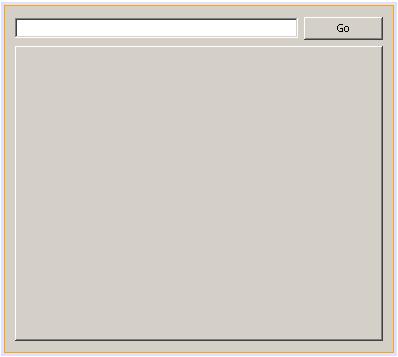
Expand “Source Packages”, right click on “twominbrowser” and select “New->JFrame Form”. Give it a name and click “Finish”. From the Palette, drag n drop a JPanel. Resize it to fit the full form. Now add a JTextField (txtUrl), a JButton and JTabbedPane (browPane). The final form should be like the screenshot on the right. Click on the image to see a bigger one.
Double click on the JButton (“Go”) or right click on it and select Events->Action->actionPerformed. Write the following code. Press Alt+Shift+F to resolve unresolved classes. Press F5. Should you get any errors, delete the Main.java from the “Source Packages” node and press F5 again. It should now compile and execute.
try
{
WebBrowser wb=new WebBrowser();
wb.setURL(new URL(txtUrl.getText()));
browPane.add(wb);
}
catch(Exception ex)
{
JOptionPane.showMessageDialog(null,ex.getMessage());
}
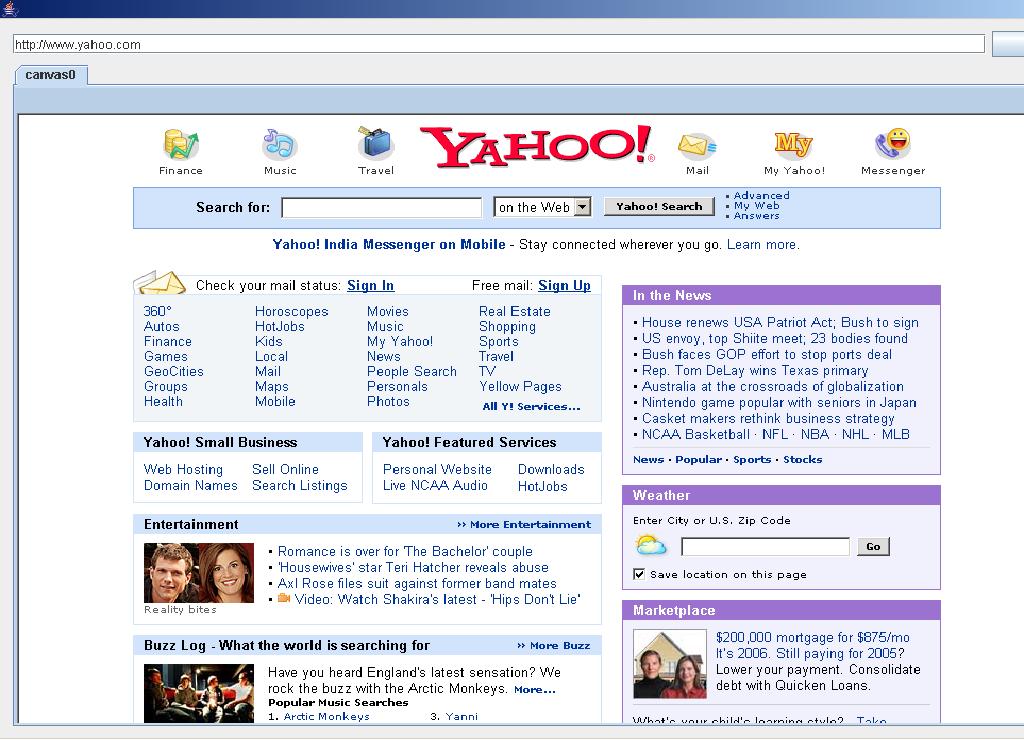
Type in a proper url at the textbox and click on “Go”. Our TwoMinBrowser will work. This is the result of display of yahoo page in our browser. The same code will work in linux also.
Continuous Integration
The days of cowboy coding are long gone at most organizations, replaced by a renewed interest in generating quality software. Continuous integration (CI) testing is a vital component in the practice of agile programming techniques that lead to high-quality software.
Continuous integration tools
> Hudson
> Buildbot
> Luntbuild
> Apache Continuum
> CI Factory
Continuous integration (CI) is a software development process that promotes the following principles:
• Maintain a single-source repository
• Automate the build
• Make your build self-testing
• Everyone commits every day
• Every commit should build the mainline on an integration machine
• Keep the build fast
• Test in a clone of the production environment
• Make it easy for anyone to get the latest executable
• Everyone can see what's happening
• Automate deployment
i gone through a lot of web site and i have seen many CI tool for automated build process. i got it some good feature in hudson over the buildbot, Continuum and CruiseControl?.
feature of hudson
web based
UI look
easy to use
xml configuration
support ant,maven,subversion,cvs
tag, console view , history view

Monday, September 6, 2010
apache process Monitoring
The basic principle is to regularly use the ps command to get a process list, then to filter is using grep, then filter using grep again to remove the line from the process list which was filtering for processes ('grep httpd' contains the phrase httpd so it gets included in the initial filter). Finally use the wc command to do a count of the result. This theory produces the following line of code which you can run on your system…
ps aux | grep http | grep -v "\(root\|grep\)" | wc -l
Here is an explanation…
ps aux
Get a process list. The 'a' causes a full process list for the current terminal. The 'u' causes it to be user-oriented. The 'x' causes it to be for the current user only.
grep http
This goes through the list produced and reduces it to lines containing only the word 'http'.
grep -v "\(root\|grep\)"
Unfortunately for the previous process, it also contains one of the words it's filtering for - this means it appears as one of the processes. Root also owns one of the Apache processes (the parent one maybe?). We want to filter out these two so we use grep as we did before but filter out for the lines containing grep and root. The '-v' option tells grep to make this an inverse-filter.
wc -l
This is a really simple and yet useful function. It's a word counter and the '-l' (thats a lowercase L) option tells it to count newlines which is what separates our process in the list!
By running the above command you will get a number returned on the terminal. This tells you how many apache processes are currently running on your system. A slight variation on the initial 'ps' command will give you some pretty usefull information…
ps axo 'pid user size cmd' | grep http | grep -v "\(root\|grep\)"
This version will very nicely list you out a table of running apache processes (not caused by root or grep) with only 4 columns - Process ID, Username (of the process owner), Size (in Kb - I THINK) and the Command that was run. This means you can quickly see how much actual RAM your webserver is using for apache!
This, quite simply, will log the apache process. If the threshold count is breached (in this case, 100) then it will create a lock file and email the address specified letting the admin know that they're quite close to their limit. The lock file gets deleted when the process count drops below the threshold again.
ps aux | grep http | grep -v "\(root\|grep\)" | wc -l
Here is an explanation…
ps aux
Get a process list. The 'a' causes a full process list for the current terminal. The 'u' causes it to be user-oriented. The 'x' causes it to be for the current user only.
grep http
This goes through the list produced and reduces it to lines containing only the word 'http'.
grep -v "\(root\|grep\)"
Unfortunately for the previous process, it also contains one of the words it's filtering for - this means it appears as one of the processes. Root also owns one of the Apache processes (the parent one maybe?). We want to filter out these two so we use grep as we did before but filter out for the lines containing grep and root. The '-v' option tells grep to make this an inverse-filter.
wc -l
This is a really simple and yet useful function. It's a word counter and the '-l' (thats a lowercase L) option tells it to count newlines which is what separates our process in the list!
By running the above command you will get a number returned on the terminal. This tells you how many apache processes are currently running on your system. A slight variation on the initial 'ps' command will give you some pretty usefull information…
ps axo 'pid user size cmd' | grep http | grep -v "\(root\|grep\)"
This version will very nicely list you out a table of running apache processes (not caused by root or grep) with only 4 columns - Process ID, Username (of the process owner), Size (in Kb - I THINK) and the Command that was run. This means you can quickly see how much actual RAM your webserver is using for apache!
#!/bin/bash

THRESHOLD=100
ADDRTO=karthik@mysite.com"
SUBJECT="Apache Process Check"
LOCKFILE="/tmp/apache_process_check.lock"
LOGFILE="/var/log/apache_processes.log"

NUMHTTPD=`ps aux | grep http | grep -v "\(root\|grep\)" | wc -l`

echo "`date +'%Y-%m-%d %H:%M:%S %Z'` - ${NUMHTTPD}" >> ${LOGFILE}

if [[ ${NUMHTTPD} -gt ${THRESHOLD} ]]; then
if [ ! -e "${LOCKFILE}" ]; then
  echo "The number of currently running httpd threads is ${NUMHTTPD}." | mail -s "${SUBJECT} - Above Threshold" ${ADDRTO}
  touch ${LOCKFILE}
fi
else
if [ -e "${LOCKFILE}" ]; then
  rm -f "${LOCKFILE}"
  echo "The number of currently running httpd threads is ${NUMHTTPD}." | mail -s "${SUBJECT} - Below Threshold" ${ADDRTO}
fi
fi
Subscribe to:
Posts (Atom)